Template technology for a creative wall design
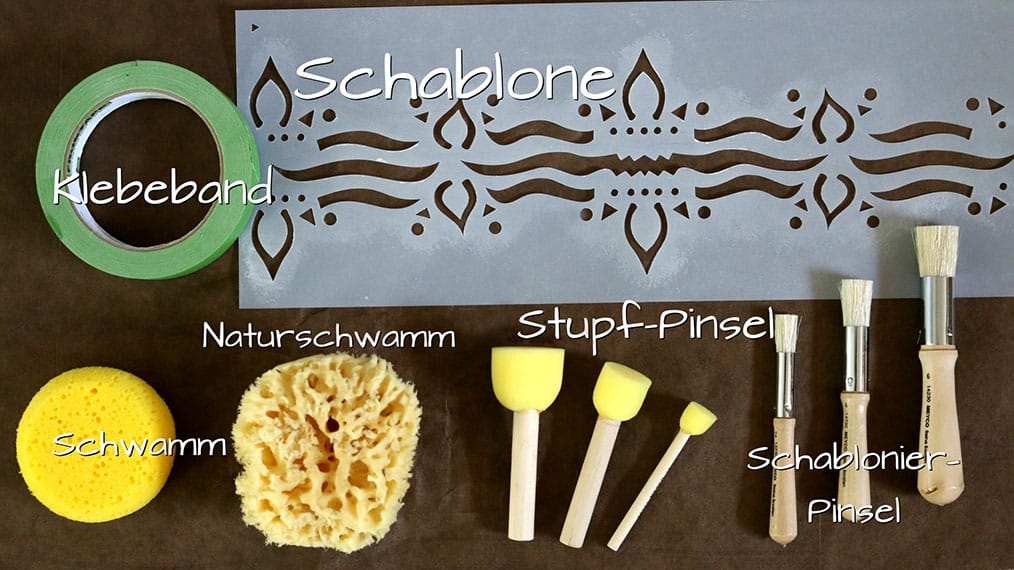
Stencil technique: In these instructions, we will show you how you can use a stencil properly and achieve a clean result. You will need some tape to hold the stencil to the wall and a brush or sponge for the whole project. As you can see in the picture, there are extra stencilling and stippling brushes at Schablono. With these, the colour can be applied cleanly. You can also apply the paint with a sponge. It is up to you whether you choose a simple or coarse sponge. If you want to add some structure to your pattern, you can achieve this with a coarser sponge, such as B. a natural sponge. To fix the stencil to the wall, a simple painter’s tape is ideal. But you can also use a removable spray adhesive that allows the stencil to be peeled off the wall without leaving any residue.

If you have never worked with a stencil before and do not yet have a feeling for how much paint should be on the brush or sponge, we recommend that you practice something on cardboard, a scrap of wallpaper or paper on the wall before starting. The surface should be free of grease and well cleaned. You can basically use all surfaces. Smooth surfaces are very suitable, but also rough surfaces, e.g. B. a woodchip wallpaper is no problem. A thicker, undiluted paint is ideal for stencils. Generally speaking, less is more. After only slightly stencilling a surface at first, dab a second layer of paint if necessary.

In the first step, you should fix the stencil to the wall with some tape or a removable spray adhesive. To fix the stencil really well, you should apply painter’s tape around the stencil. Before doing this, please do a test on the wall to see whether old paint comes off when you peel off the painter’s crepe. If necessary, reduce the adhesive strength and stick a strip of masking tape several times on a smooth surface and peel it off again.

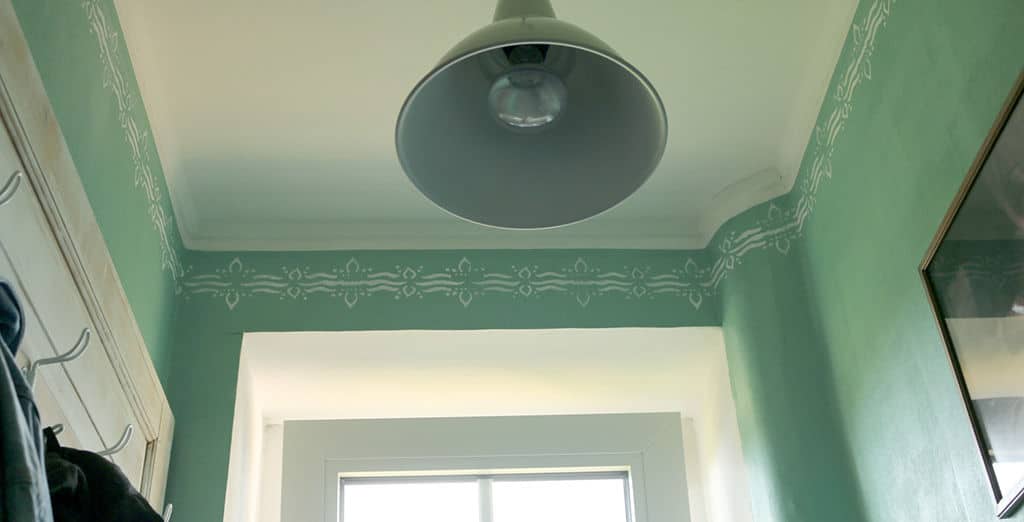
On the Schablono stencils, a registration mark is stamped as a small triangle on borders, which you can use to get a continuous motif. By placing them next to each other, you get a coherent pattern. To do this, you simply have to put a point at the top corner of the triangle with a pencil and then you can offset the template again at the point. So that the wall does not get damaged, it is advisable to stick some tape under the triangle. Then nothing has to be erased later.

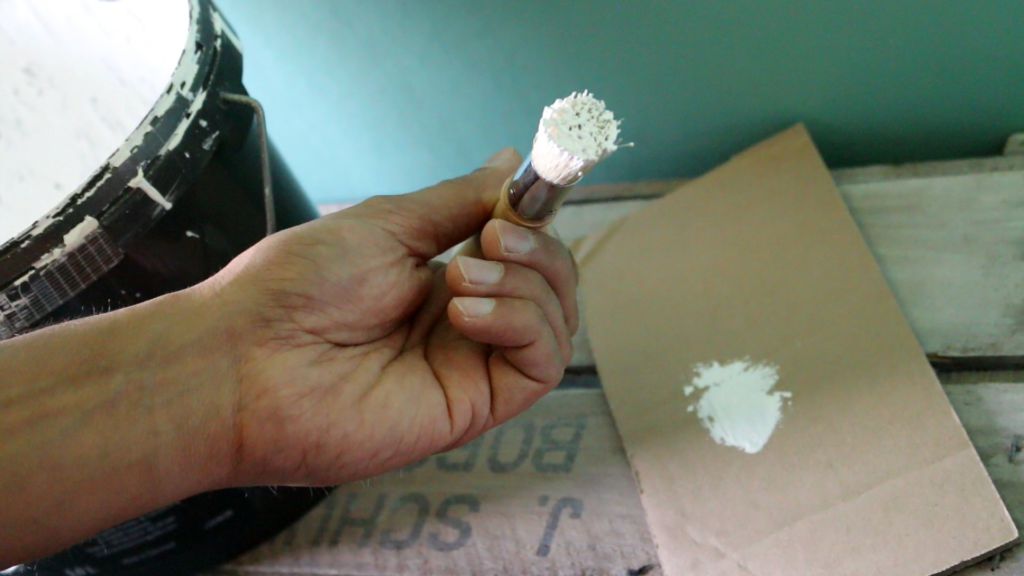
A piece of cardboard is a great way to accurately determine the amount of paint that is on the brush. Simply dab the brush on the piece of cardboard until the desired colour intensity is achieved. The brush is now dabbed onto the stencil. How much colour there is on the brush and how hard the brush is pressed onto the stencil, determines the application of colour and the subsequent appearance. A vintage or shabby chic look can be achieved with a light application of paint. Before the stencil is removed, the paint should be allowed to dry a little so that the motif does not smear and the paint application remains clean. You should also check that no paint has run behind the stencil. Otherwise, you can blow-dry the stencil briefly on the back with a hair dryer.
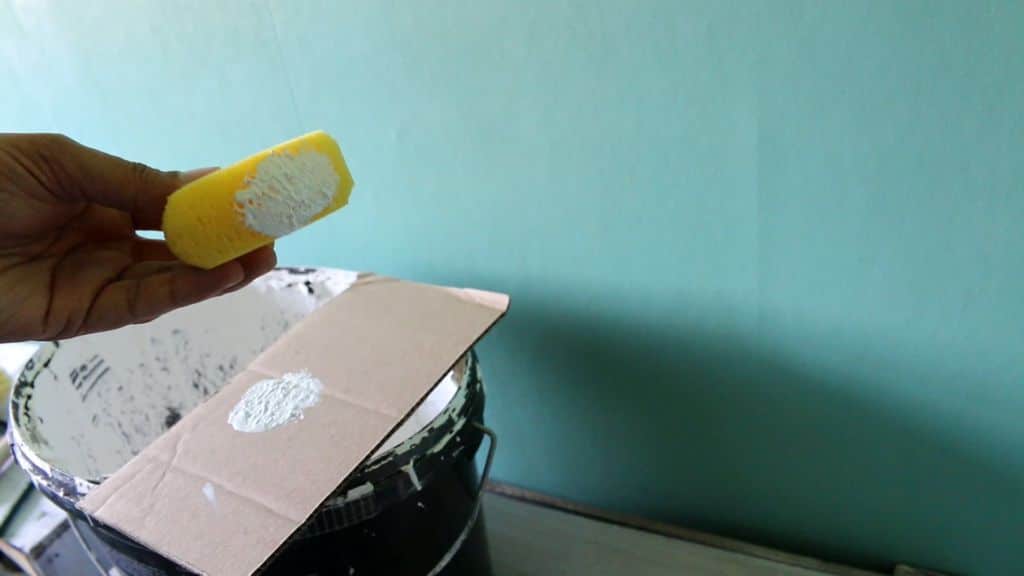

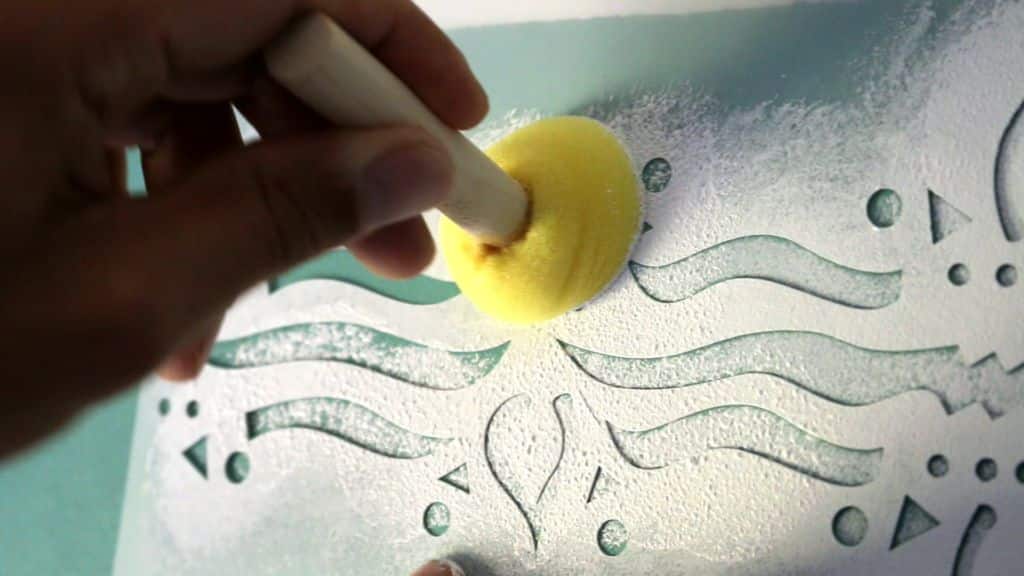
In the second round, we will show you the order with a fine-pored sponge. This should also be dabbed on a piece of cardboard. The sponge is very suitable for working quickly, over large areas and for achieving “open-pored” surfaces and motifs. It is advisable to have as little paint as possible on the brush or sponge and then you should apply the paint in 2 coats – with a short drying time.
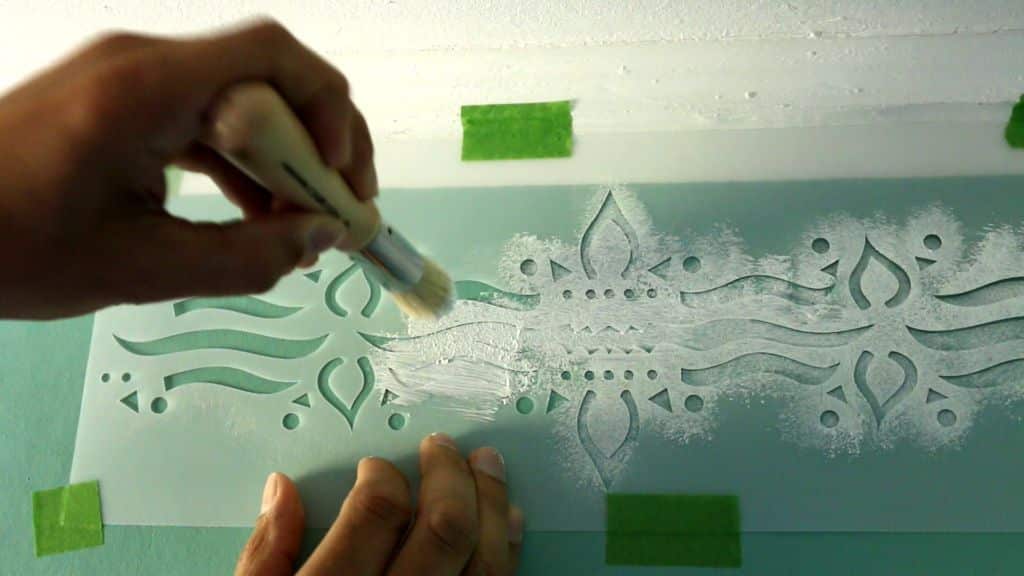
The third job is completed using a stippling brush, which is available in different sizes. When dabbing, you must hold the brush straight and not at an angle, otherwise there is a greater risk of the paint running under the stencil or being driven. The stencils are washable and reusable and can also be easily attached to curves and corners.

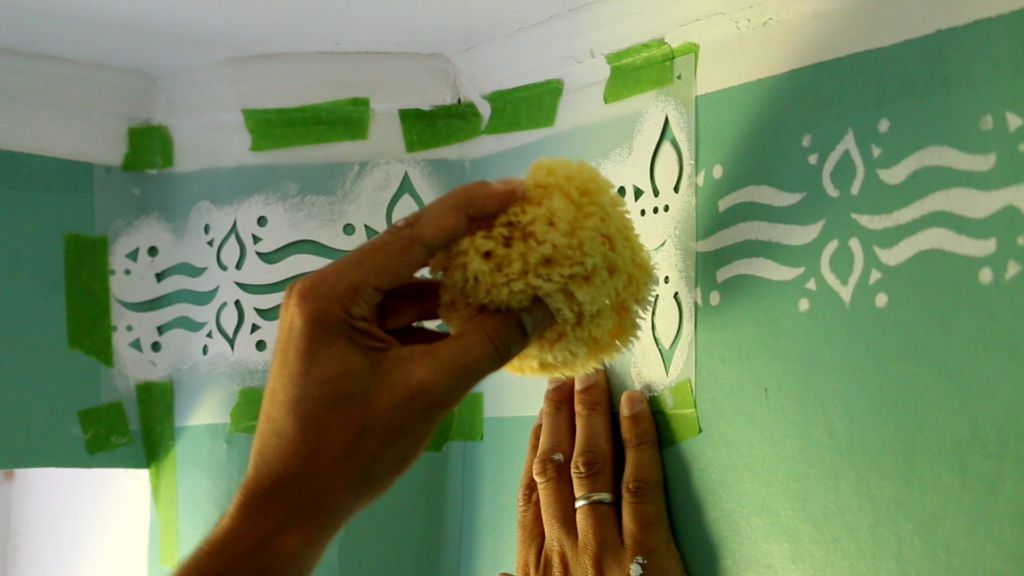
In the 4th order, we will show you using a natural sponge that is more open-pored and leaves a different structure. The difference between a stencilling brush, a stippling brush, a simple sponge or a natural sponge can largely be seen in the working speed. With sponging, you can fill larger areas with paint faster. A stencil brush or stippling brush is ideal for small and very fine work. The end result of the different brushes and sponges depends on the tools used. The application of paint is determined entirely by the tool, the dabbing, the amount of paint and the individual handwriting of the processor.
First folded in order to stencil in the corners, the stencils can easily be bent back into their original shape. The schablonit® material is very flexible and robust and has been tried and tested for years thanks to its use in the painting trade. There are no limits to the design ideas and you can also work with several colours. It is Z. B. possible to design the edges of meander motifs in a darker shade in order to get a nice shadow effect later. You can also work with colour gradients and show impressive results.
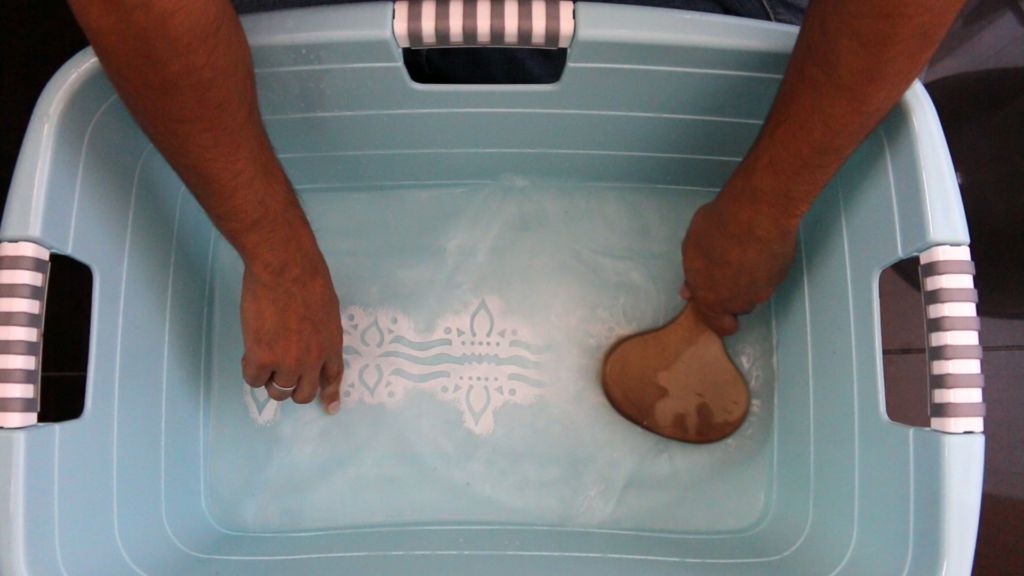
Schablono also offers you the opportunity to have individual motifs made. This allows you to implement very personal ideas that you can use for your walls, furniture or for designing textiles. Here’s another example of how easy it is to remove the paint from the stencil. To do this, I fill a small tub with warm water and briefly put the template in it. The paint residues can be brushed off with a soft brush.
Click on this video to watch our How-to video online.