Plastic stencils for your individual wall design!
Stencilling made easy: Follow these instructions carefully and you will achieve results that are impressive and will not only inspire you.
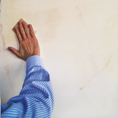
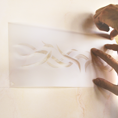


First step:
Begin by making sure that the surface is clean and free of grease. For smooth walls, sanding down uneven surfaces is advisable and will create a beautiful effect. If your surface is rough, such as woodchip or textured plaster, the effects will be different but equally pleasing.
Fix the stencil onto the wall using masking tape or removable adhesive spray. Use the small triangles on the stencil as marker points to guide you when you are making a repeating pattern. Before applying the paint, make sure you have marked up properly by copying these marker points with a pencil onto the surface where the stencil will be applied.
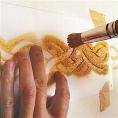
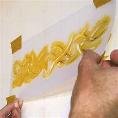
Second step:
Use a wall paint with a thicker consistency so that nothing runs behind the stencils. Use a stencil brush or a sponge for applying the paint. Dip the brush or the sponge into the paint and then onto some paper, cardboard or similar material until there is only a small amount of colour left on the sponge or brush. Now start applying the colour carefully onto the stencil. To get a feeling for the right amount of colour, dab some colour on brown paper or wallpaper leftovers. After the first coat, let the colour dry and then start dabbing again.
Third step:
After the paint has dried, remove the tape and take the stencil carefully off the wall. Before continuing with the border make sure the back of the stencil is clean and paint free – as this could smudge and mark the wall. If needed, dry the back of the stencil with a hairdryer but avoid strong heat.
Fourth step:
Clean the stencil in warm water and on a smooth surface with a soft brush very carefully. Do not use solvents, they could damage the stencils!
Design ideas:
You can work with just one colour or with multiple to achieve a special effect. For example: To achieve a nice shadow effect, you could paint the edges of a curved or arabesque motif in a darker colour then apply the paint to the rest. Cicely done colour gradients are also an eye-catcher. For these, you start with a lighter colour on one side and a darker colour on the opposite side. Then work your way to the middle and shape transitions by using less of the lighter and more and more of the darker colour. When using border stencils for edges we recommend you use a second stencil to apply the pattern into the corners. Alternatively, bend the template into the corners. The material is very durable and can be bent back into the original shape after stencilling the corners.
With years of successful business experience, the Schablono team is always happy to help.
Technique: here you will find instructive videos on the subject of stencil technique and another post for creative fabric design.
