A life without drums is possible but pointless – some drummers may think…
So why not memorialise the beloved instrument by placing it on the wall in your rehearsal room?
The successful drummer Robert Memmler had exactly this idea and commissioned us to create an adhesive template with his favourite motif… of course, a drum kit. We accepted his request and started designing his custom made drum kit straight away. We are constantly making new stencil designs, but this motif, in particular, was new territory for us. That’s why we were particularly excited to start this piece of work and see the end result. Since the motif was relatively large, we had to make the adhesive template in two parts. After hours of creating more than 4,000 individual elements, the two separate parts of the template could be brought together. The motif came with an application tape so that it could be positioned on the wall.

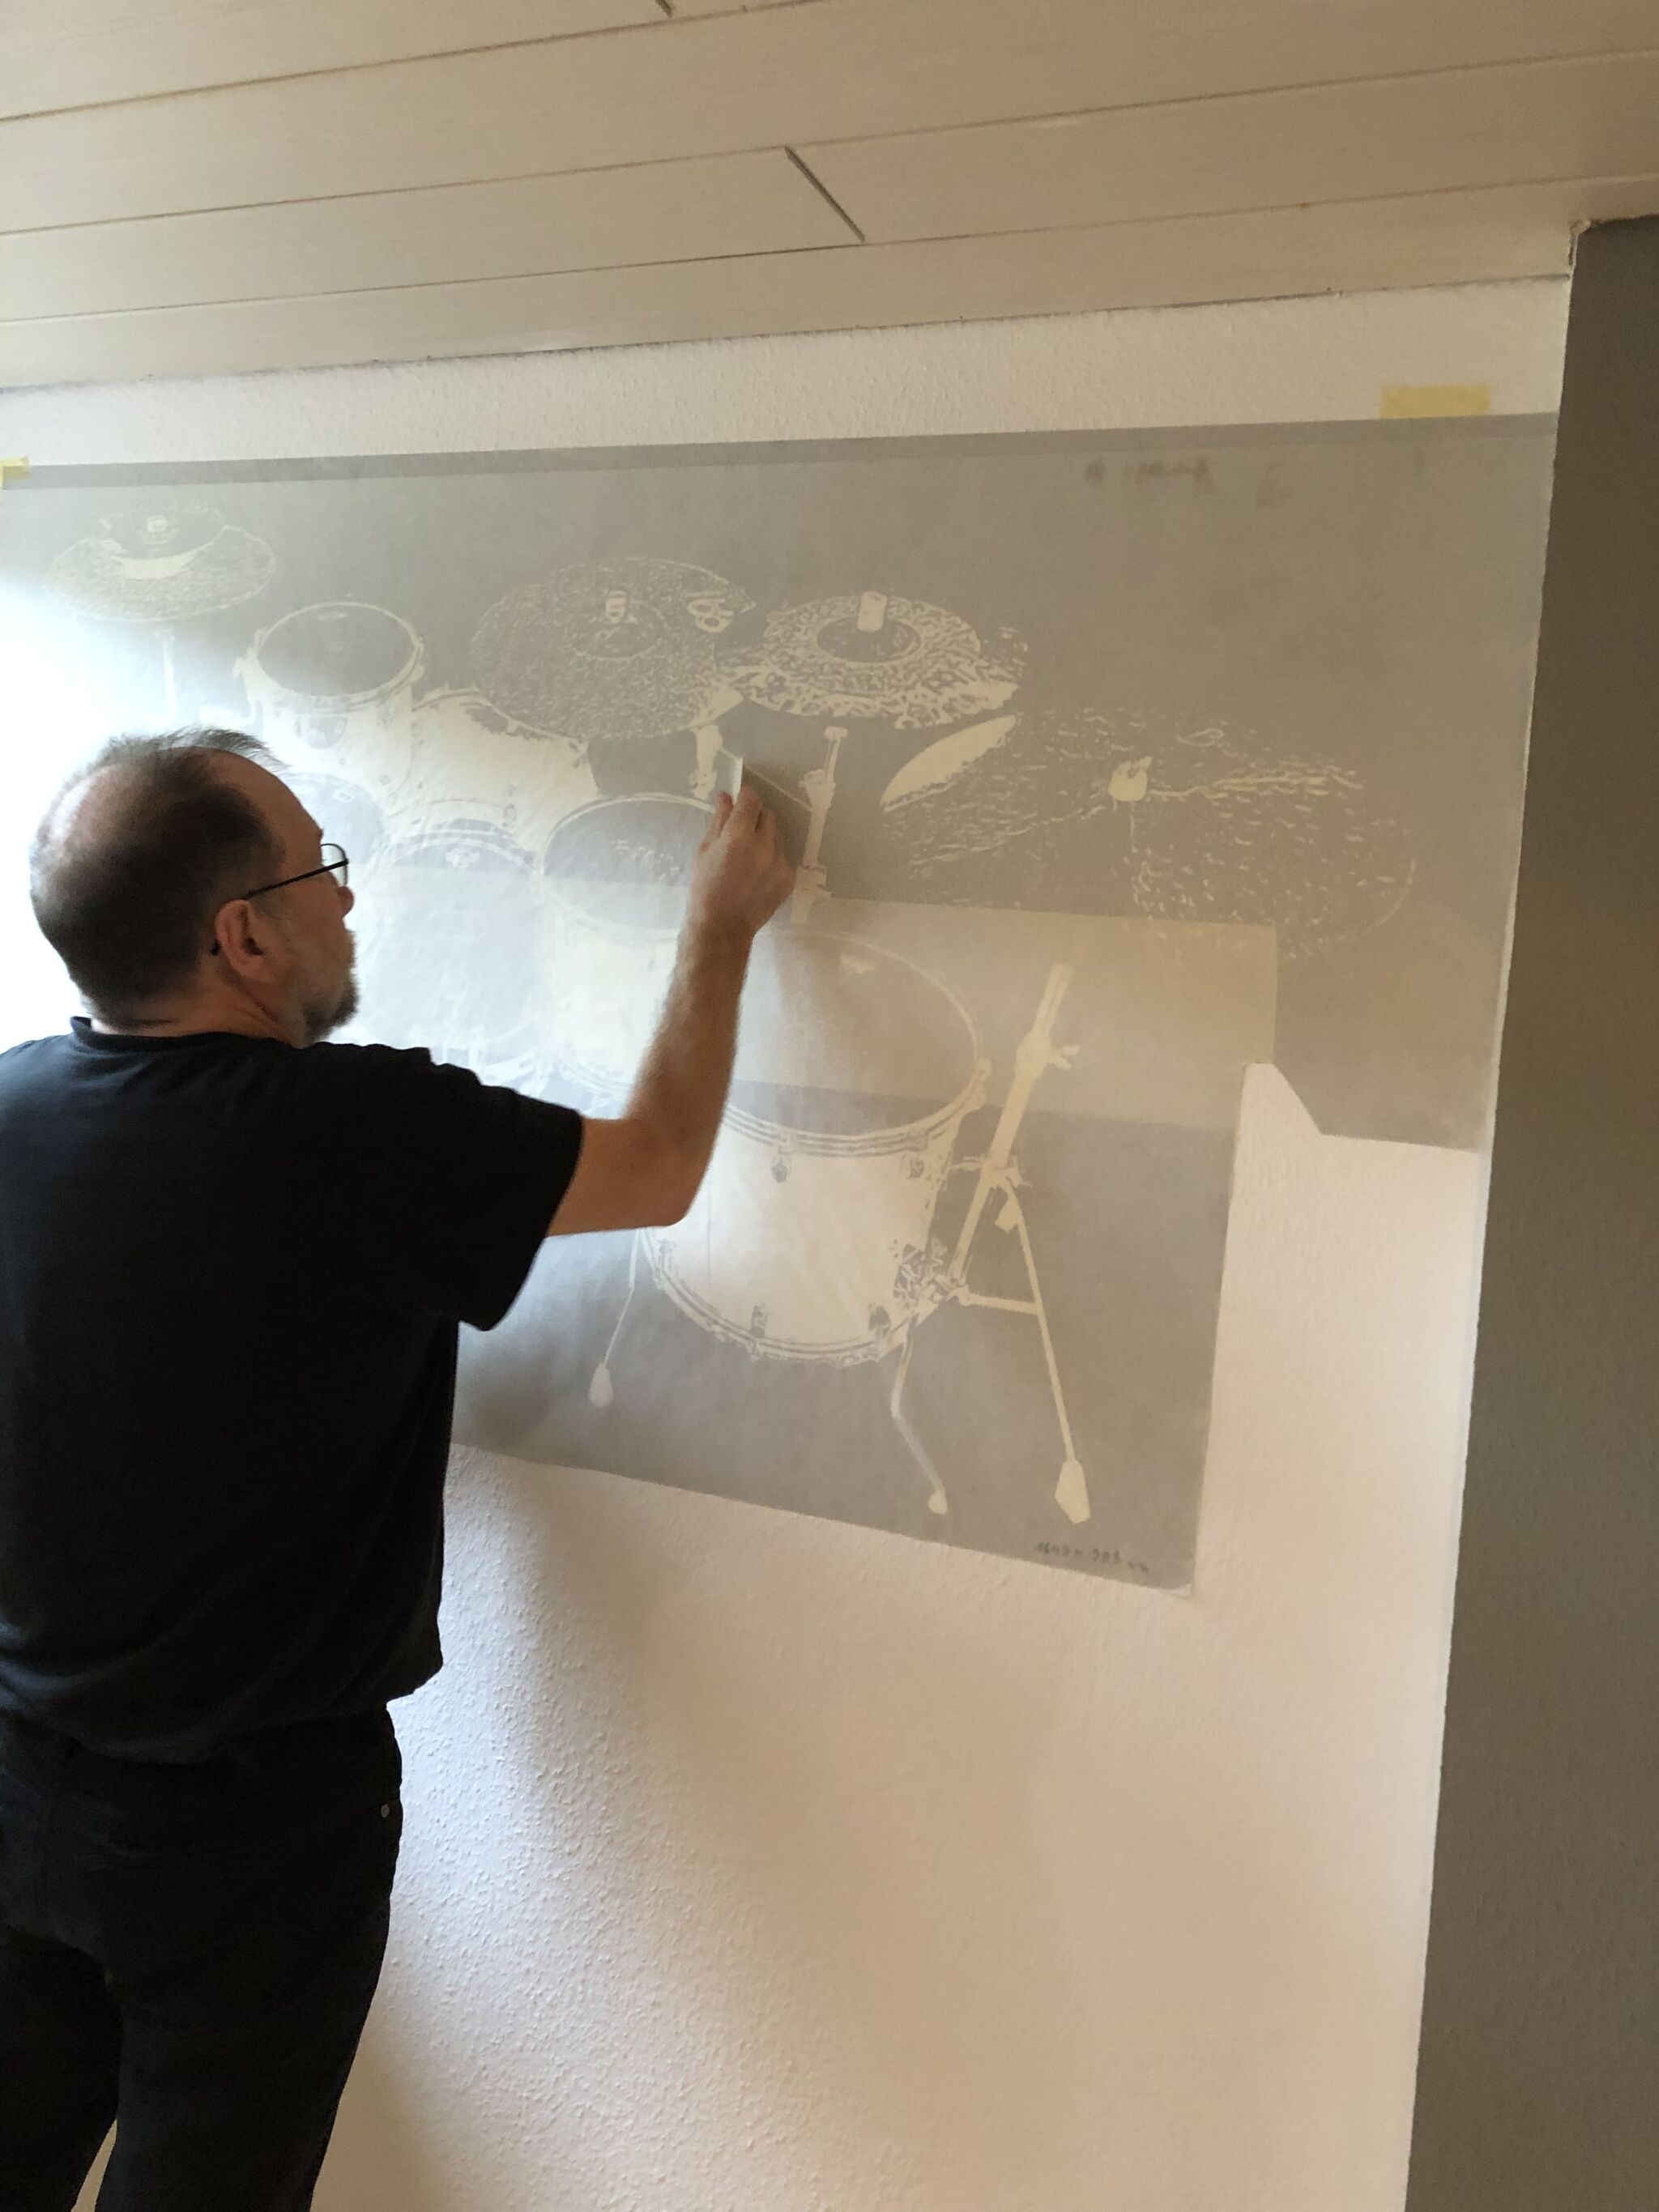
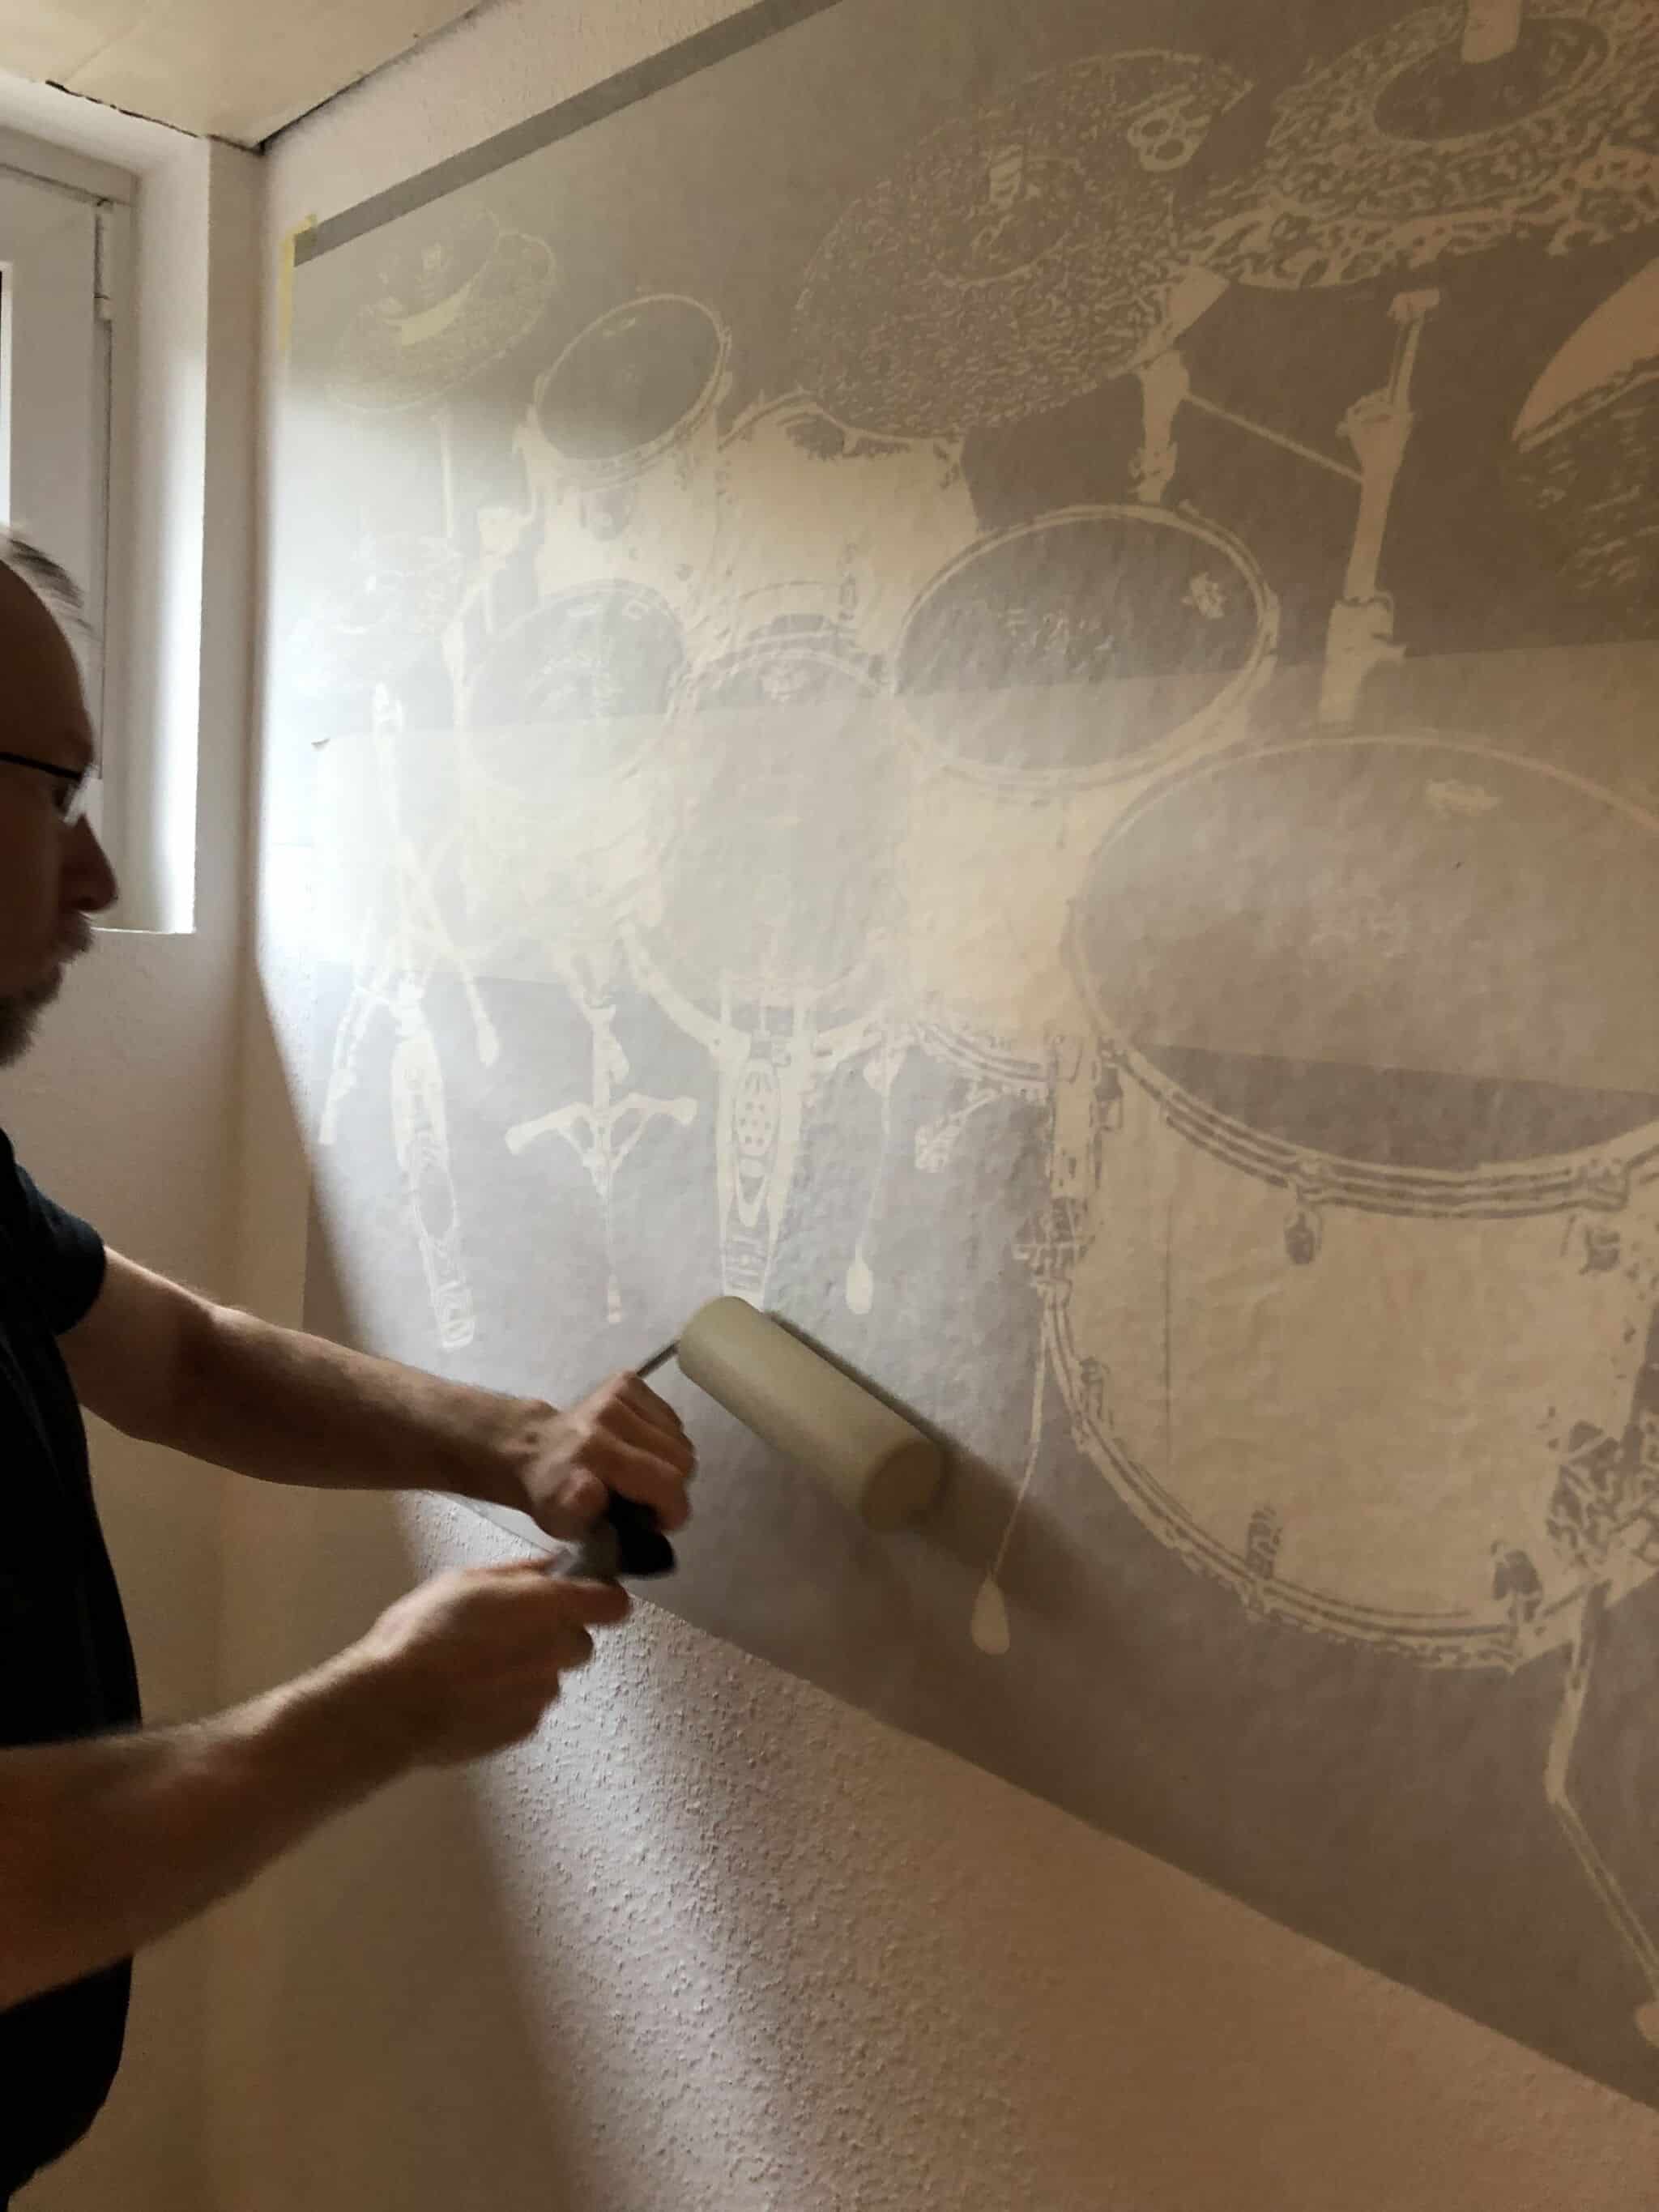
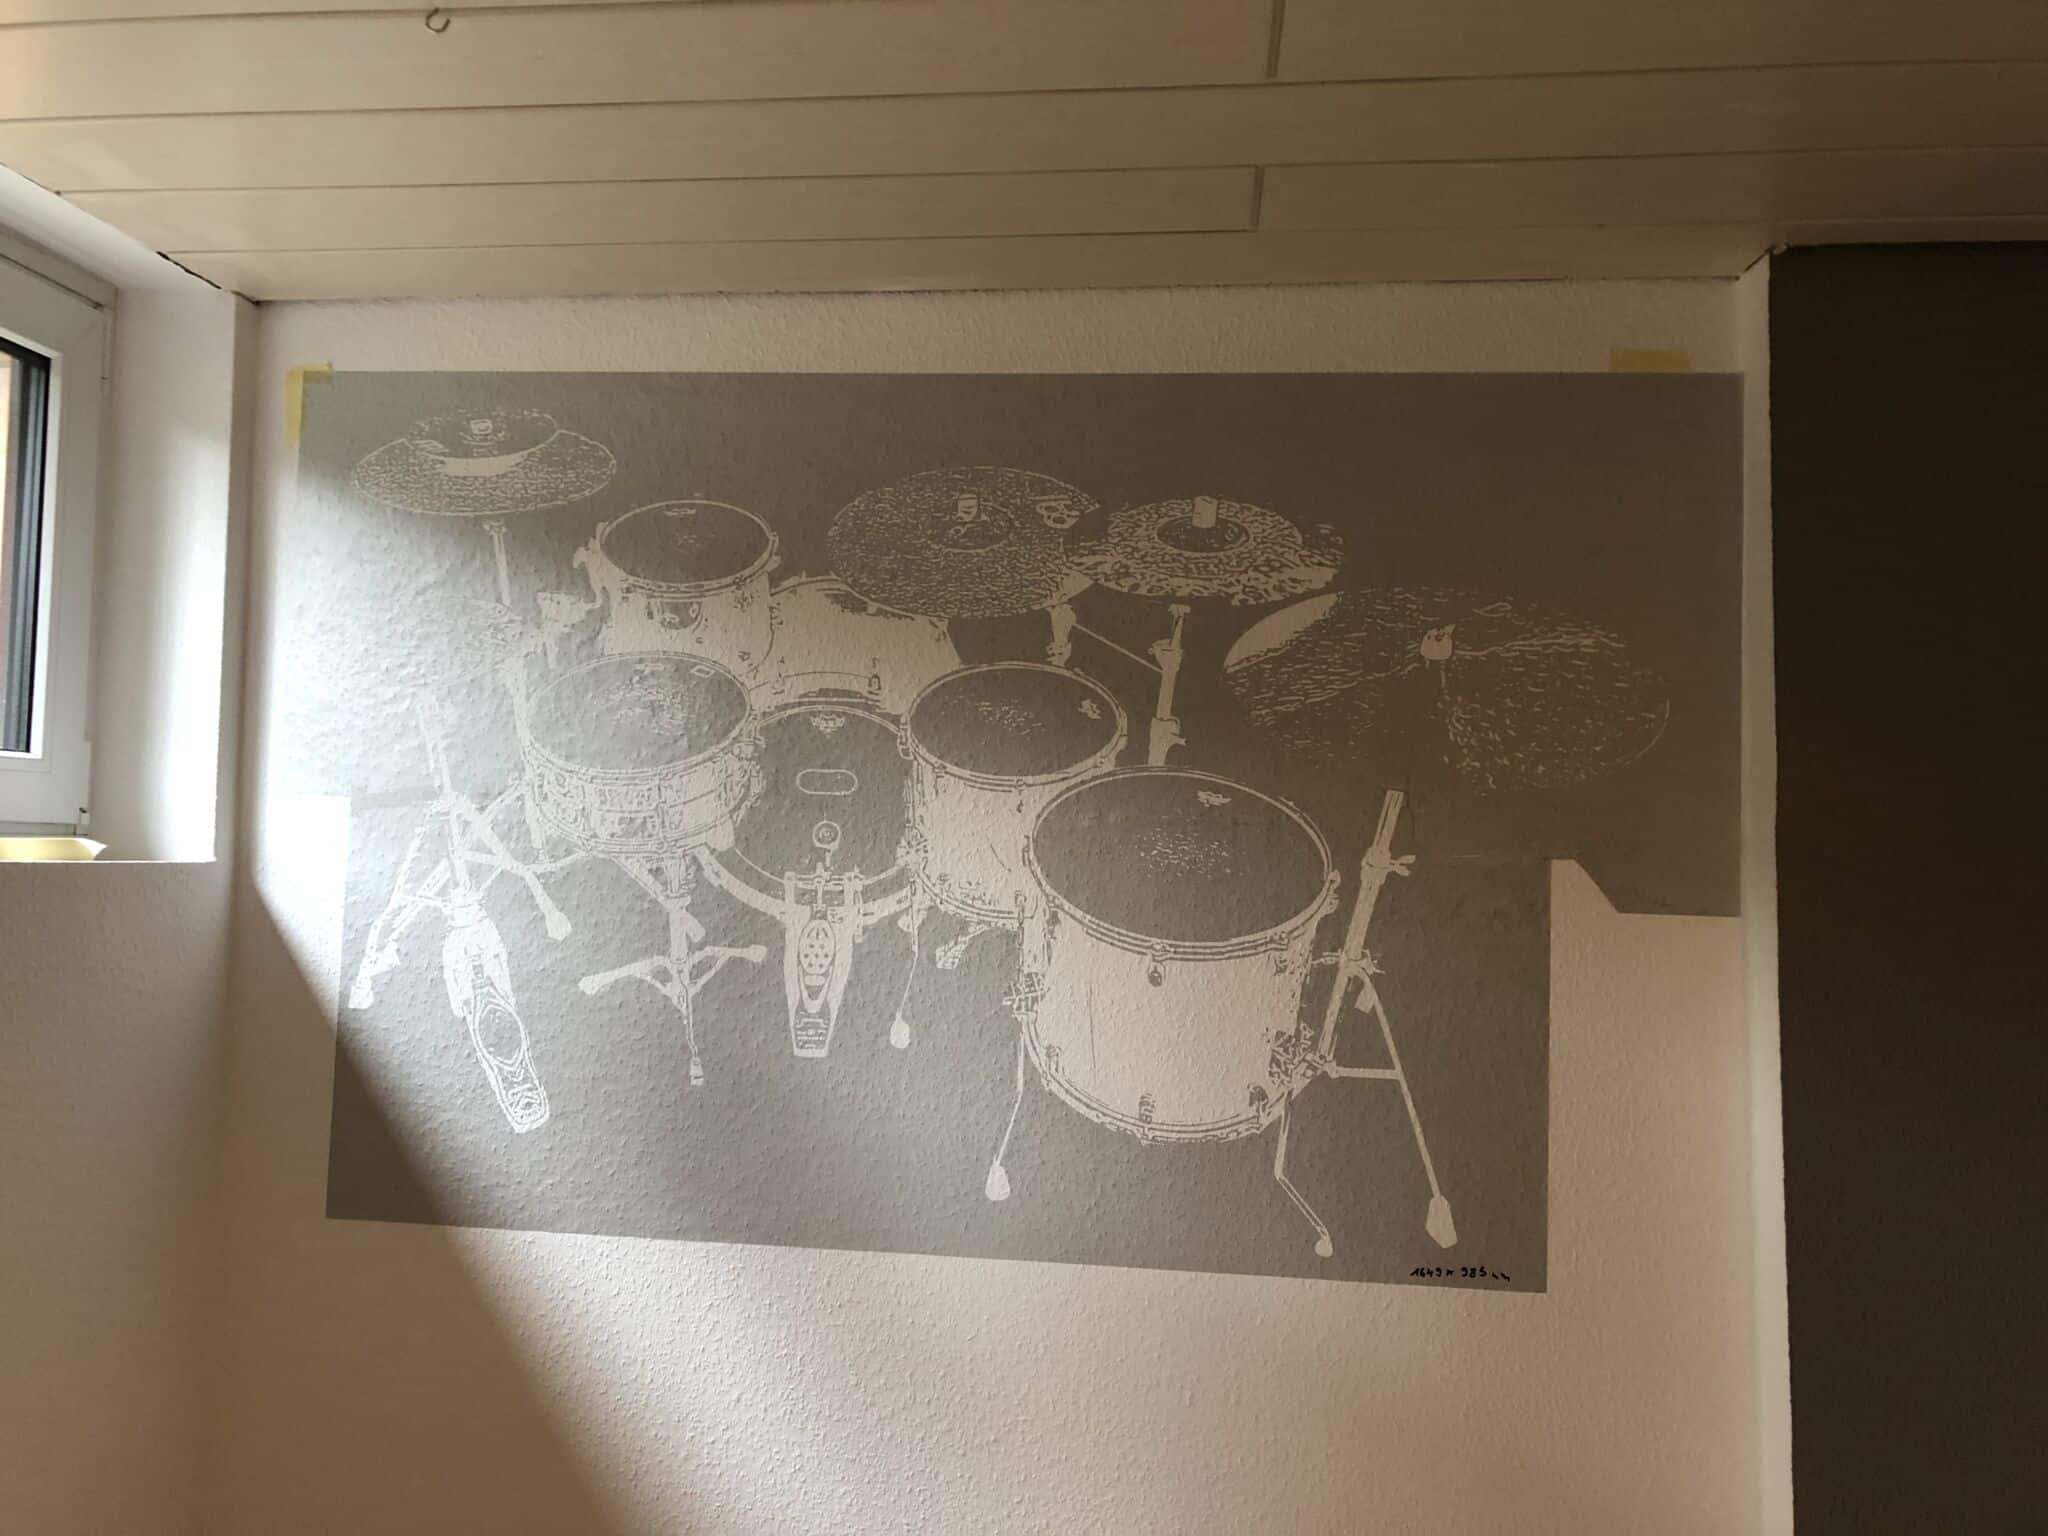
Now the motif had to be attached to the wall. It was helpful to mark the upper edges of the picture with tape on the wall, to ensure that the motif was attached on the wall straight. Now the stencil had to be painted on with the help of a roller or a spatula – this prevented bumps on the design.
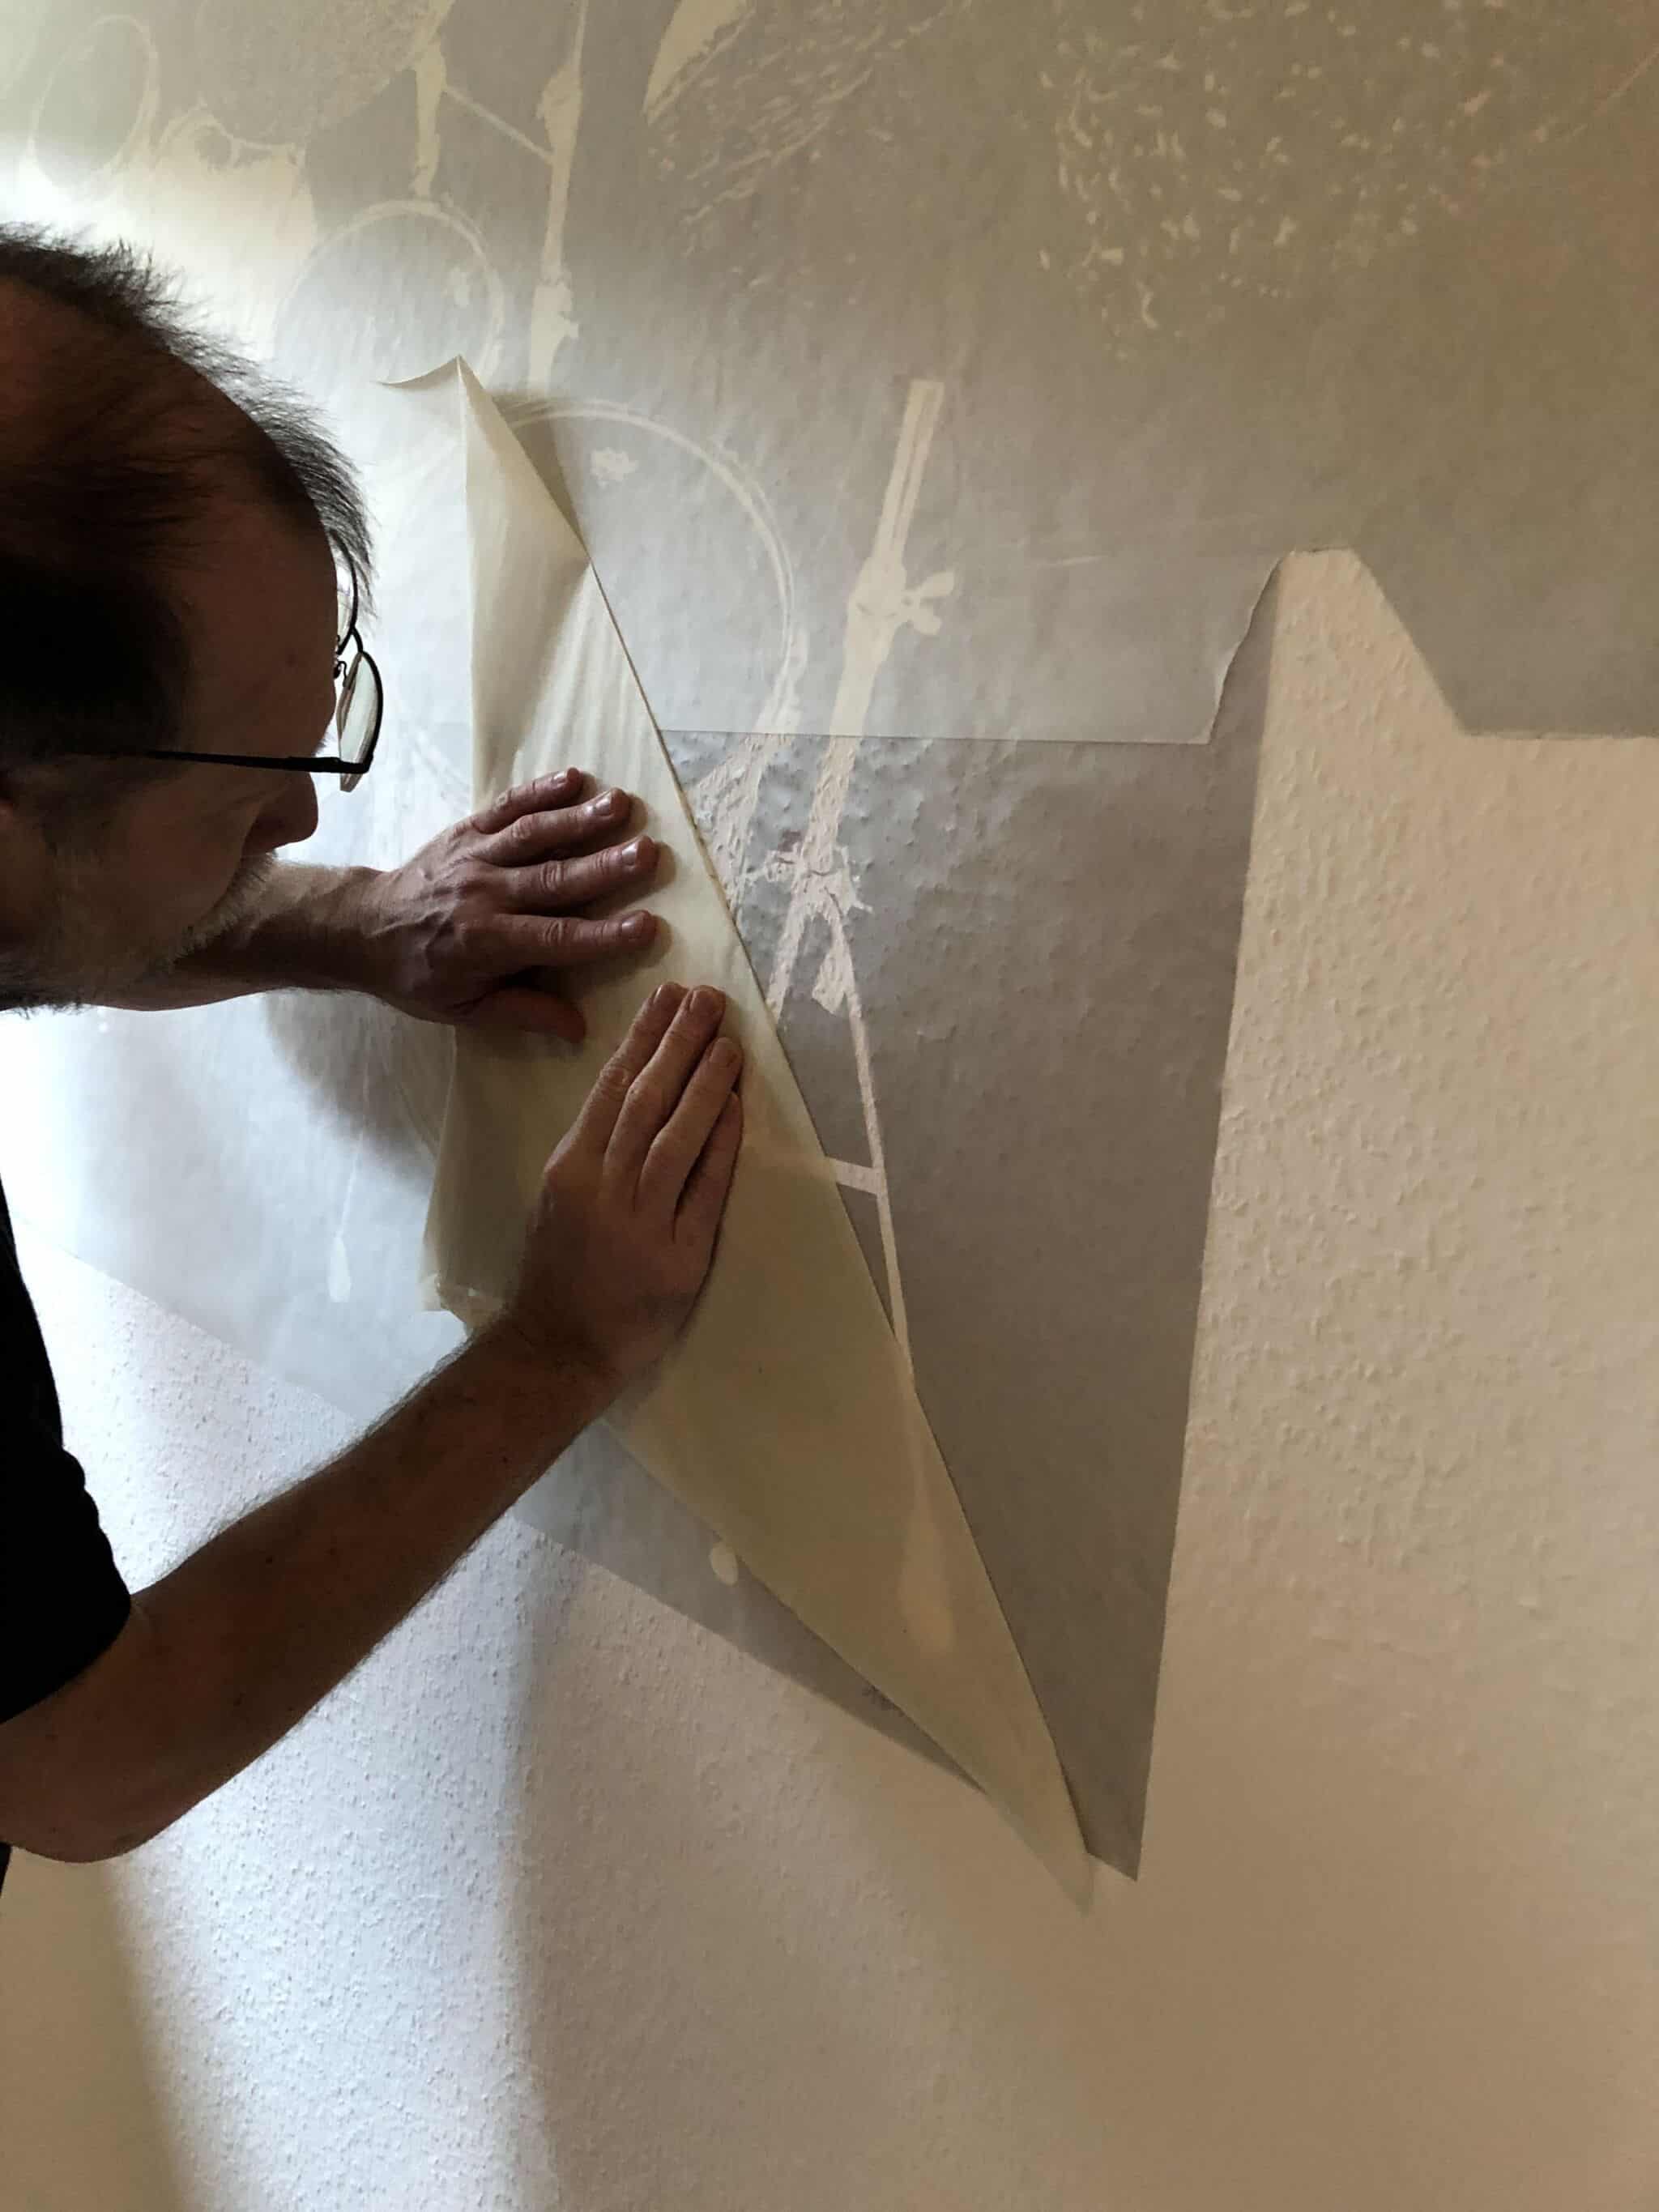
Next, the application tape was pulled off very slowly. For your own creation, it is important to note that no individual parts of the motif should be removed when peeling off. So always be patient and don’t lose your nerve. It is best to use two hands for this, as the tape sticks relatively strong to the motif and you have more strength to pull it off. Our tip: get an extra hand to help.
After peeling it off, it was clear what the drum kit would look like on the wall. And we were getting closer and closer to our finished drum kit.
Now we could finally start stencilling! It was my first time, as a new employee, but I mastered the technique very quickly. In order to completely fill the motif with paint, one spot had to be dabbed frequently. It is important to ensure that not too much paint is used, otherwise, stains may be stuck on the wall (or on the floor). So here, too, the motto is: Always work carefully and precisely!


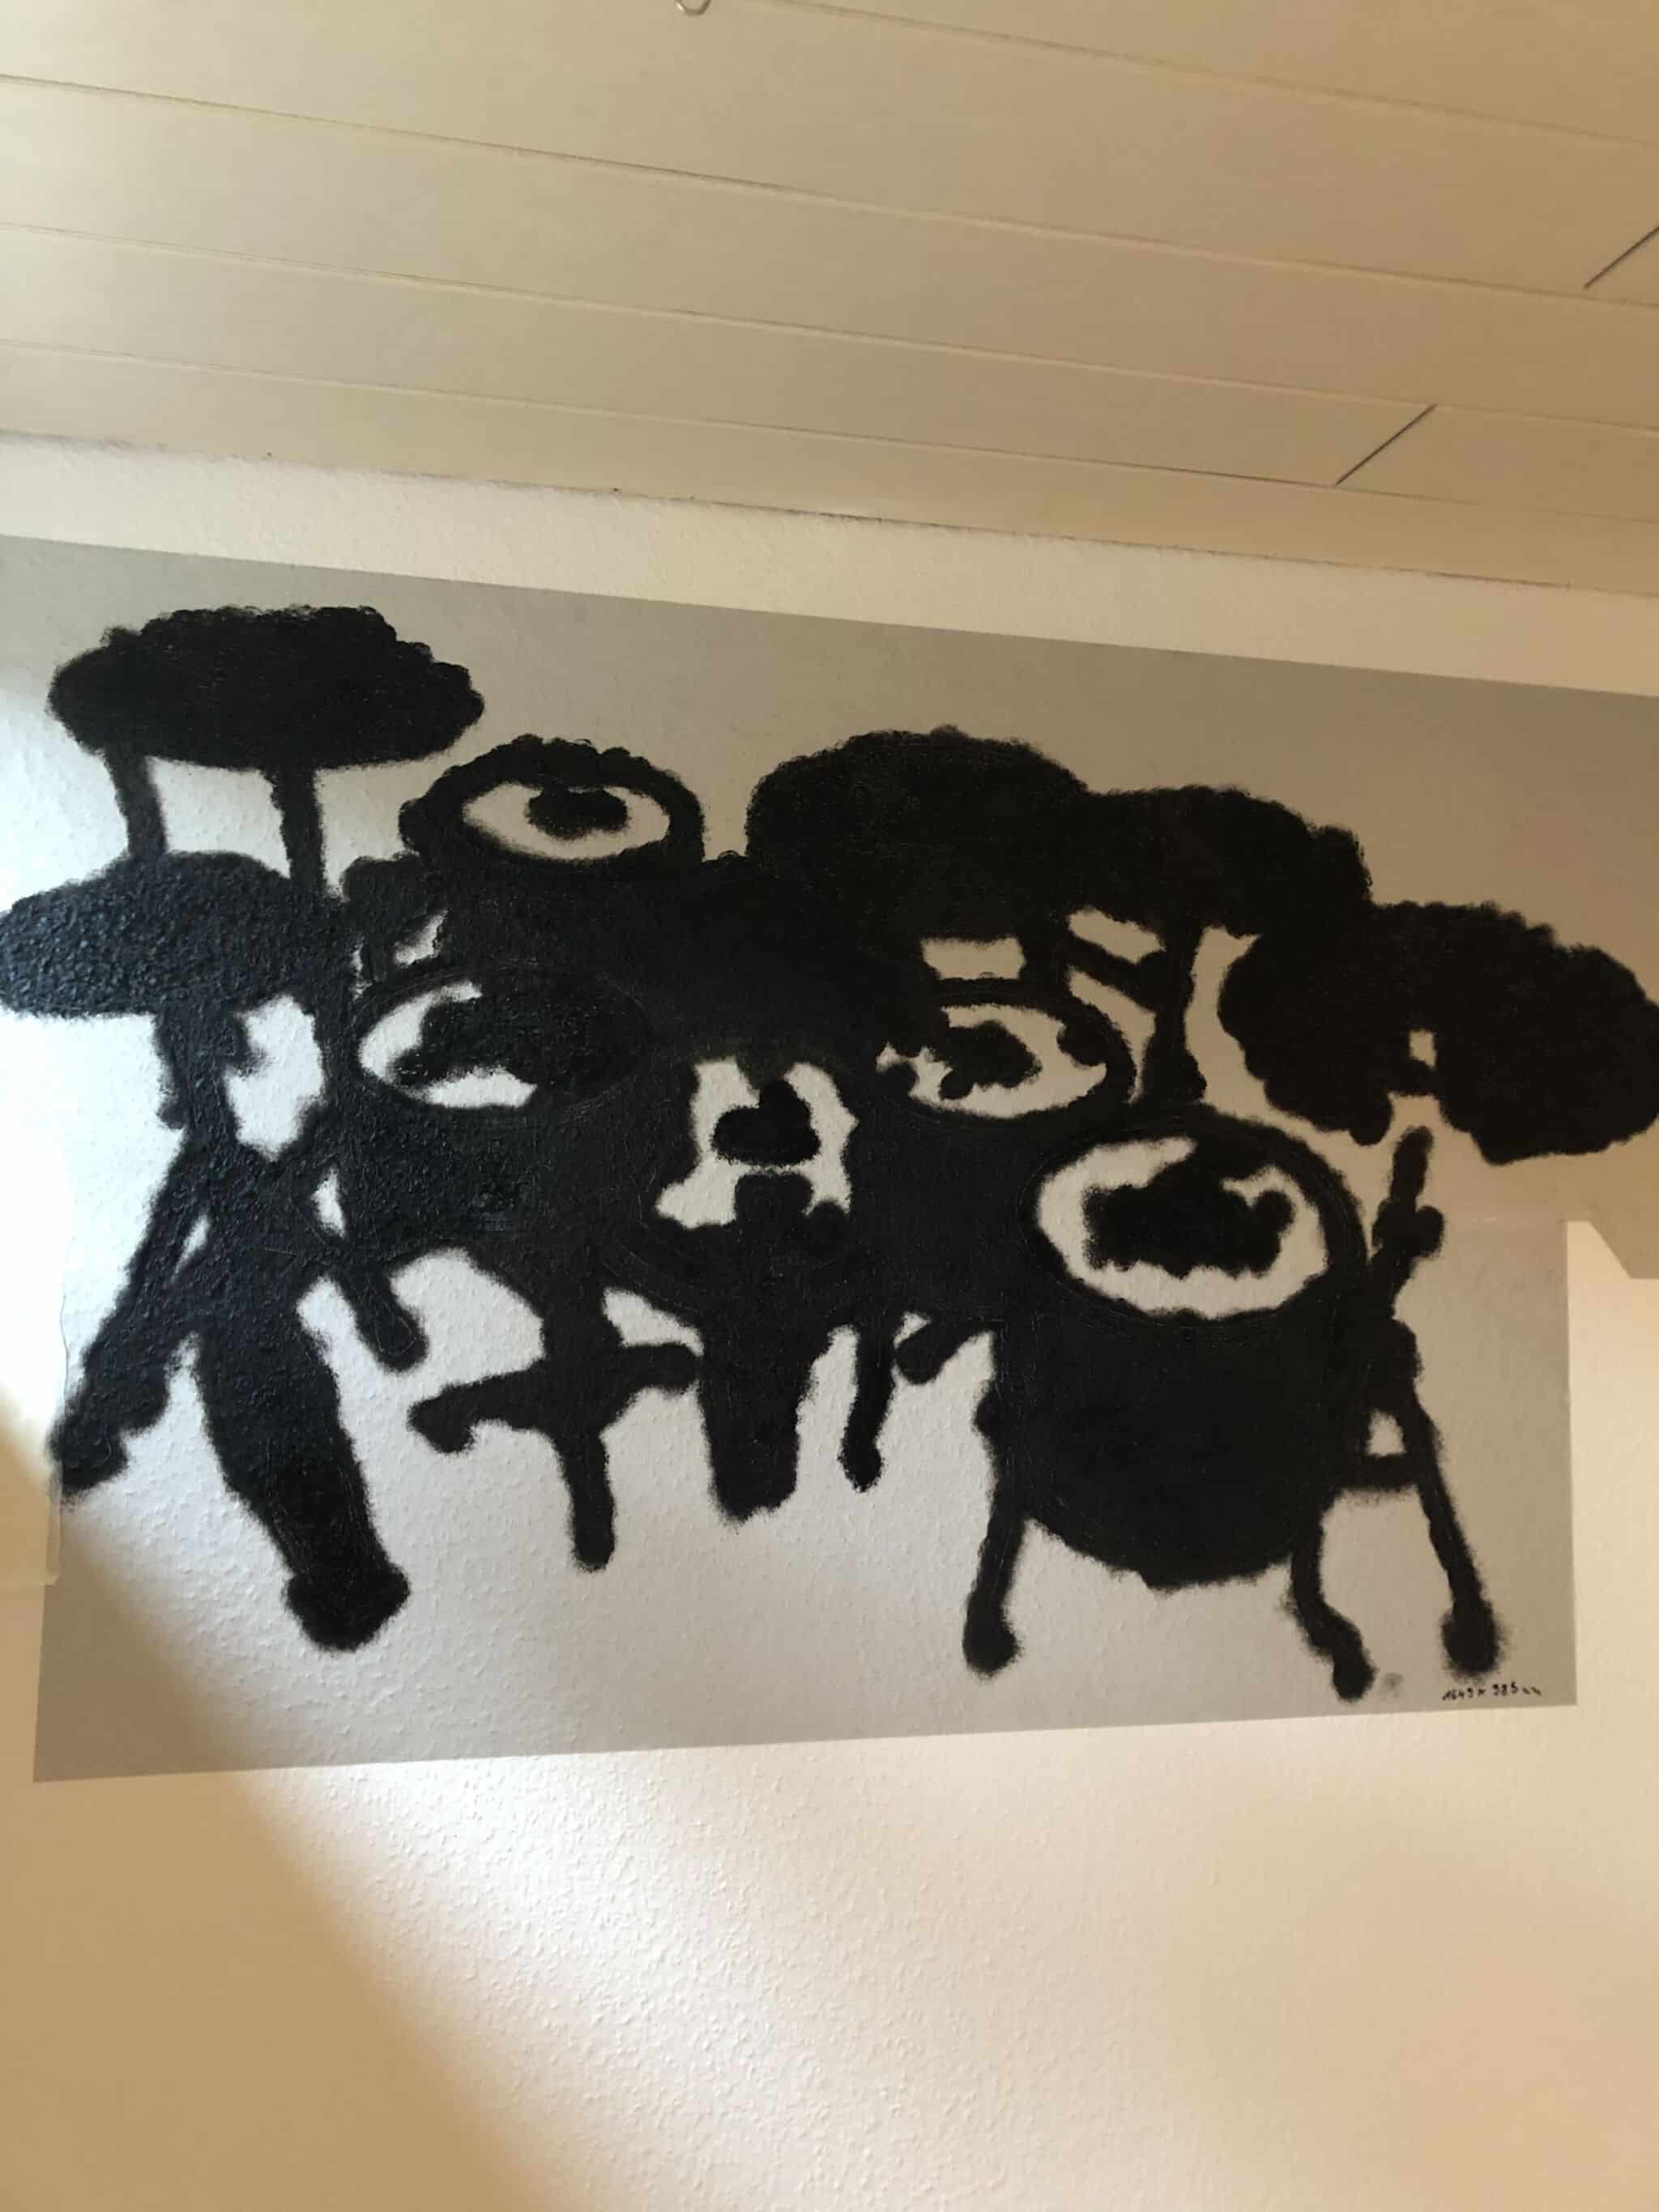
As soon as the motif had been stencilled, it was now time to remove the adhesive stencil. We were able to remove the individual parts with a cutter. It should be noted that removing the entire adhesive template takes some time. However, the result can definitely be seen. And we were particularly proud of our (almost) finished motif!

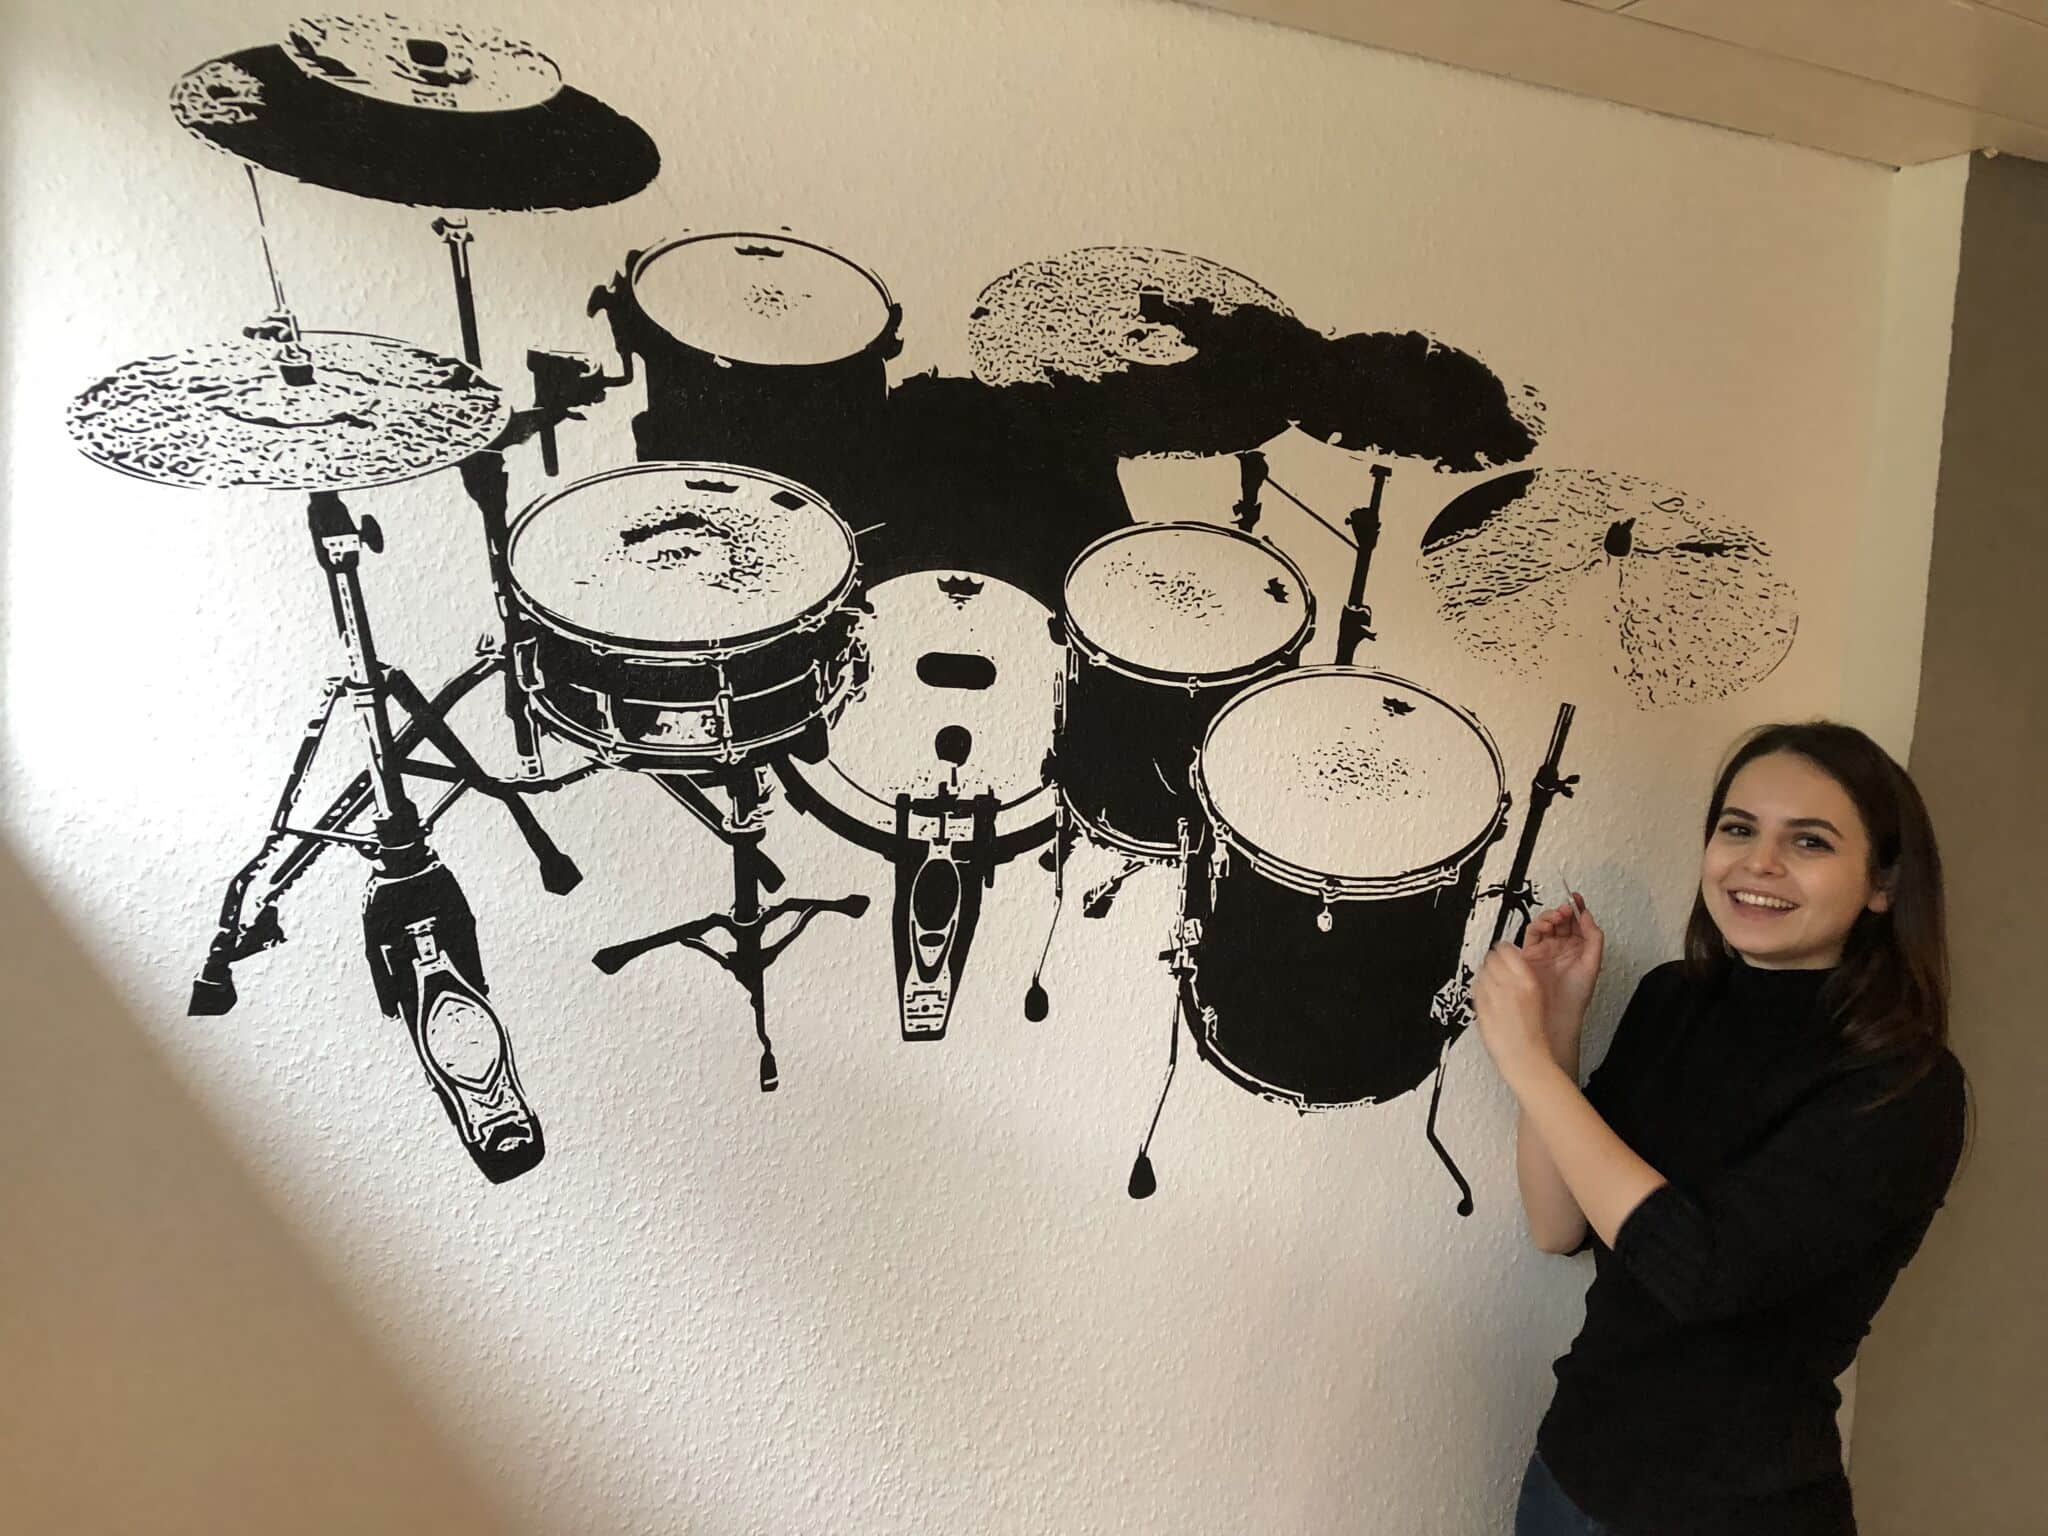
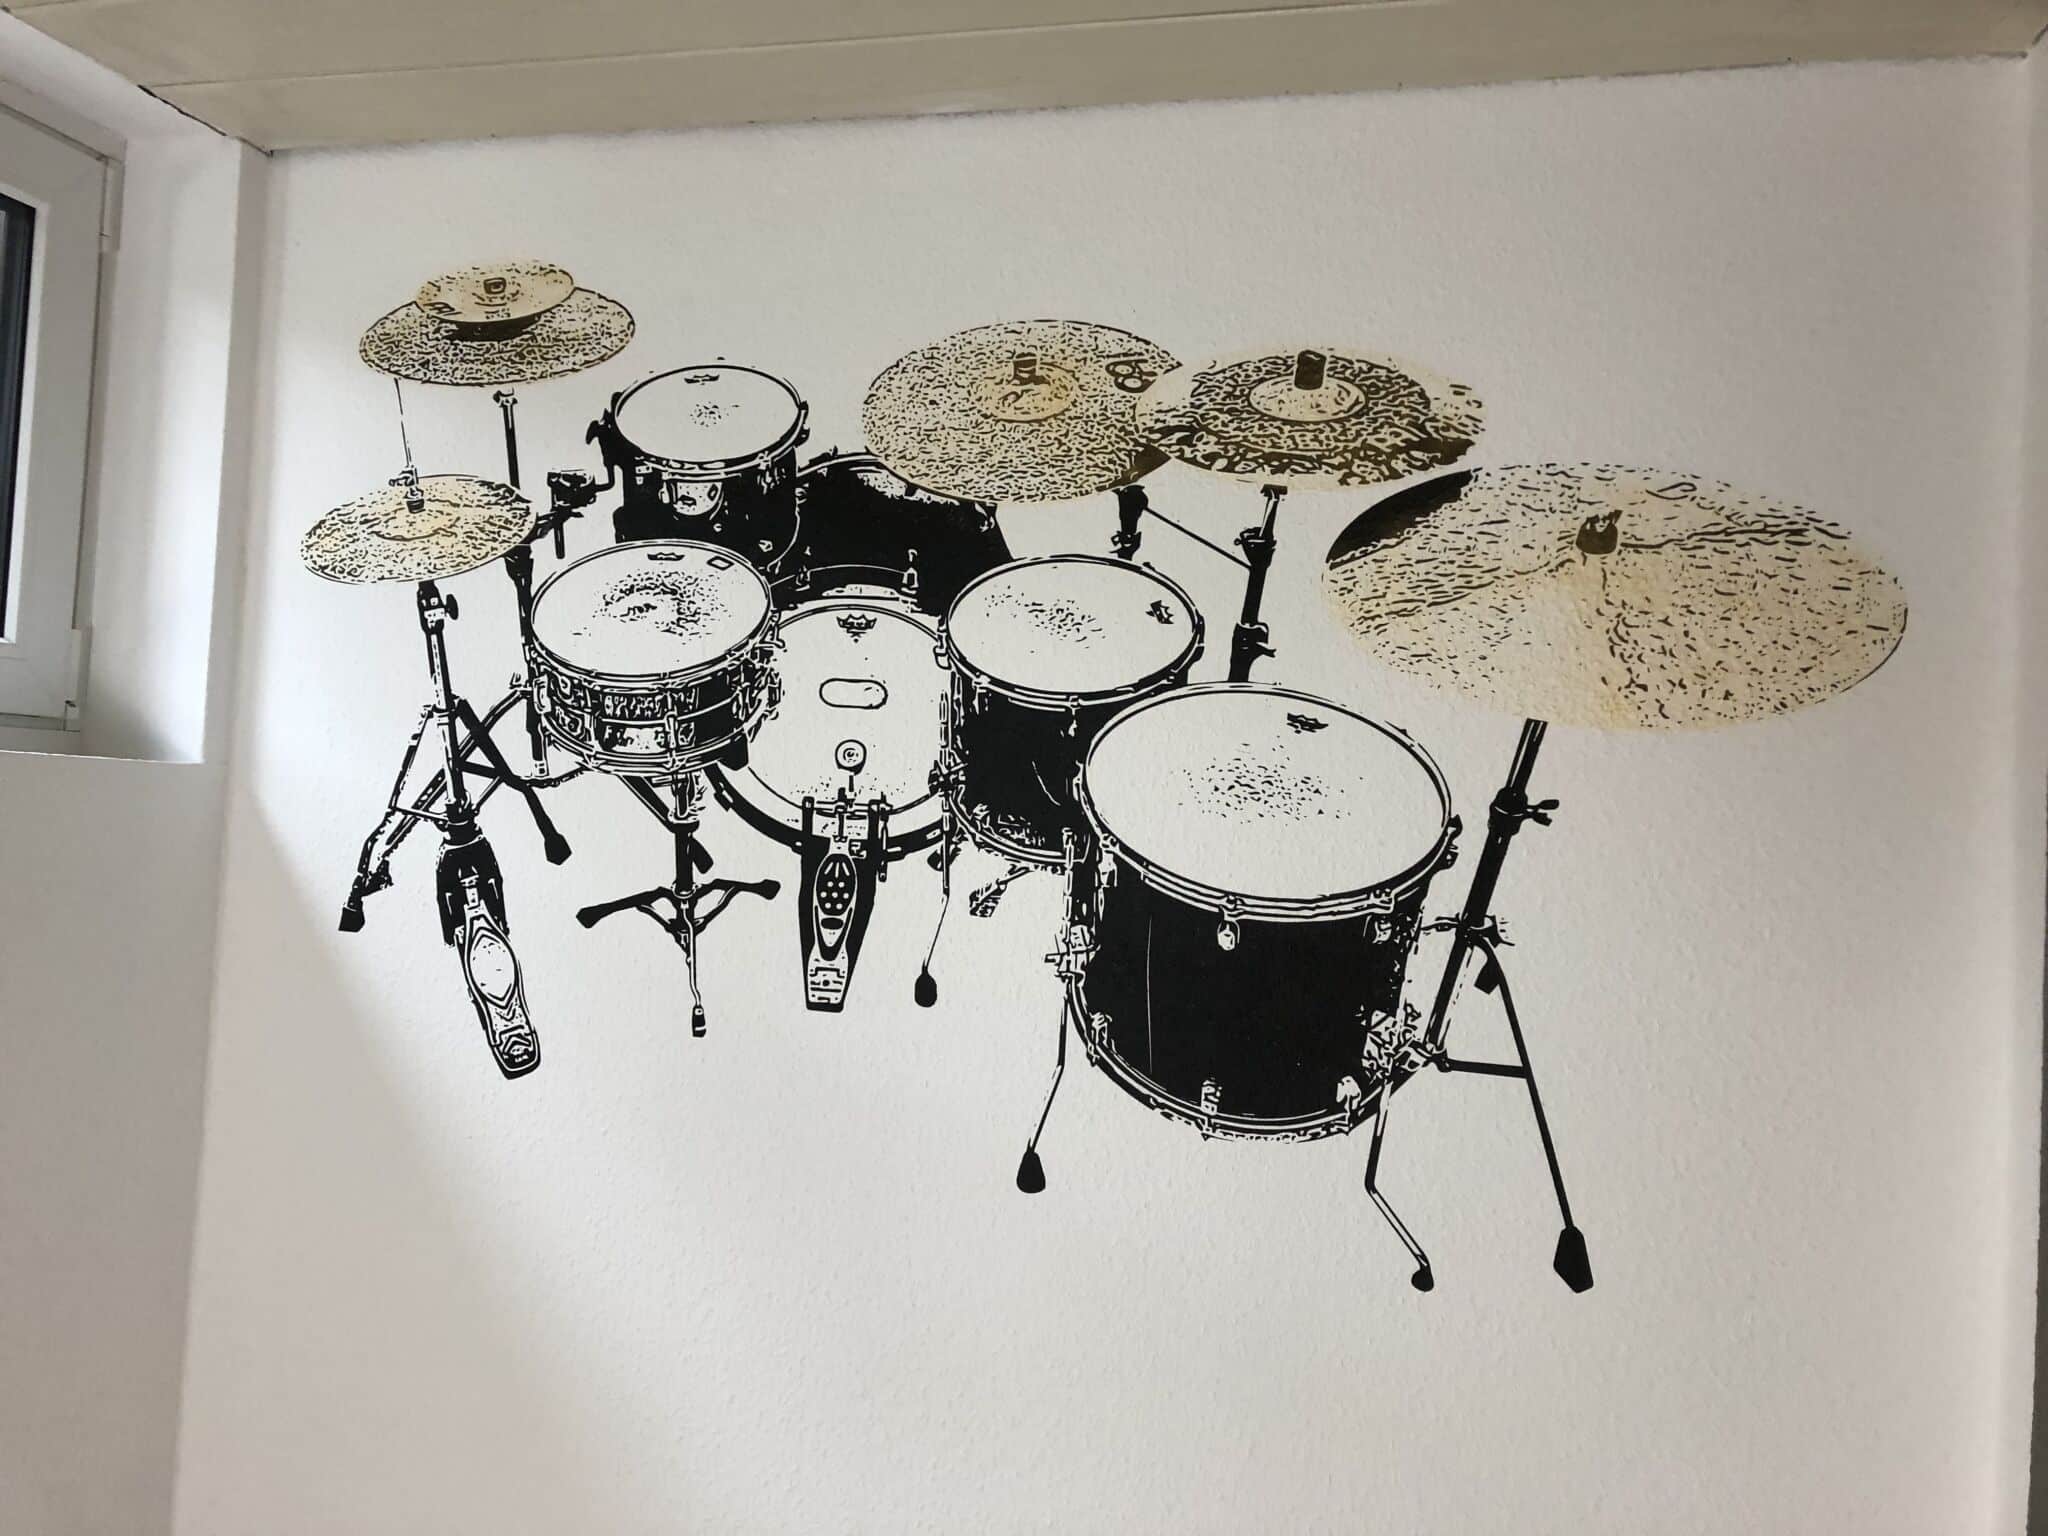
As a last step, we created some highlights by colouring the cymbals of the drums with an airbrush. We decided to use a special airbrush colour with metal pigments.
To create this effect, the symbols were masked with a normal plastic stencil so that no other wall surfaces got the golden colour when sprayed. The paint application could now be started. For all those who have no experience with an airbrush gun, we offer a metal effect spray can in our shop which gives a similar beautiful effect.

The motif was finally finished and the drummer Robert Memmler was absolutely delighted with the end result. Of course, all drum kit lovers can memorialise this motif on their wall, as we now also offer this adhesive template exclusively in our online shop.